

Here is the written directions for the body of the purse. Since the last part of the body is kind of difficult to explain, I didn't write it out on the written directions. You'll need to look at the photo directions.


I didn't decide to blog this pattern until I was half done with the purse base... oops.. This is what the bottom of the purse looks like. You can see the single crochet row that wraps around the beginning chain., then the following double crochet rows. Do 11 double crochet rows total.

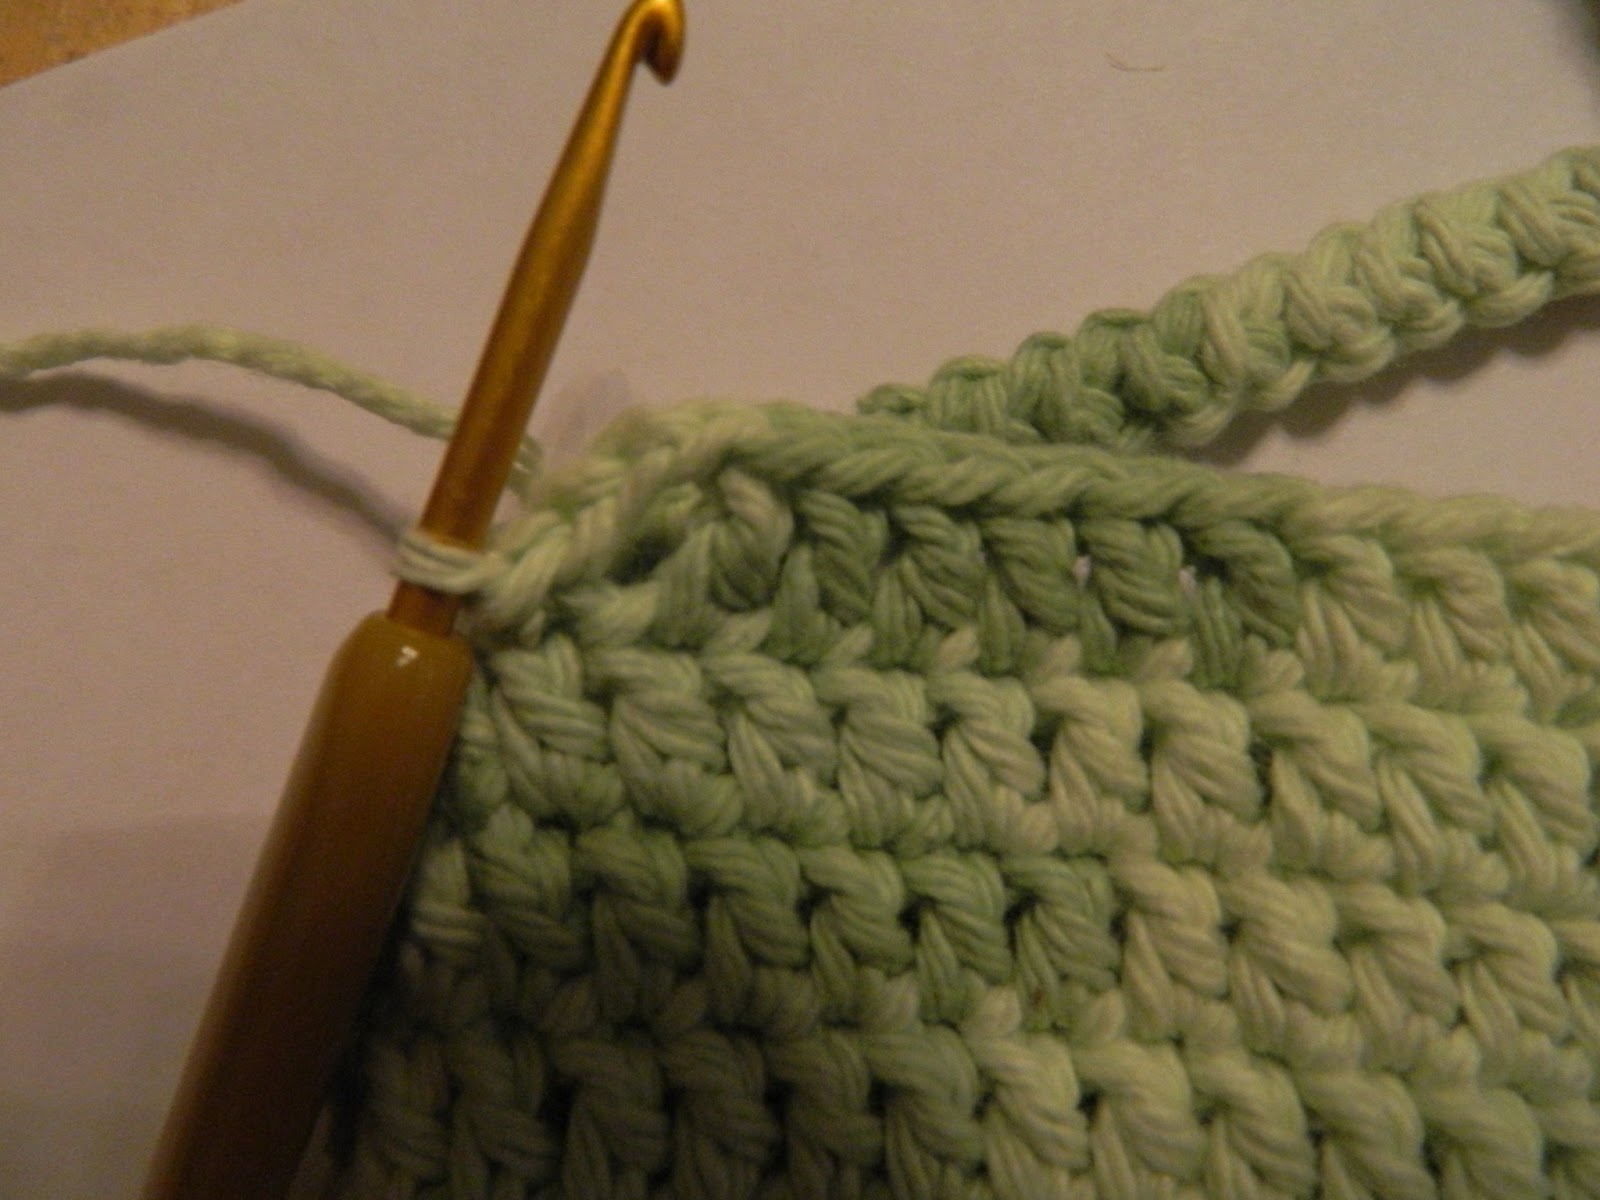
This is what the end of a row looks like. You are going to do a slip stitch in the top chain of the chain three that you did to start the row

so that it looks like this.

Now chain three again to start the next row.

Here is the first double crochet done on the next row...

Notice how the chain three from each row is stacked on top of each other. You start and end each row at the chain three.
Now for the really confusing purse handle... I use the Venetian Lace Cord stitch. Below are my instructions to remind me how to do it. If it's confusing to you (it probably is!) you can go online and find better driections - probably a U-Tube video- to explain it better. But I will do my best..

When you have finished the 11 rows of double crochet,

Chain 1.

now, skip one stitch and put your hook through the second stitch - coming backward towards you -. This will center the handle on this side of the purse.

yarn over and slip stitch.

turn the purse 1/2 to the left and put the hook through the chain 1.

single crochet.

turn the purse 1/2 turn to the left again and put the hook through the two bars as shown and single crochet.

so that it looks like this.

Turn the purse 1/2 again and put the hook through the two bars and single crochet. Continue turning and single crocheting until the sholder strap is the length you want.

Now we are attaching the sholder strap to the other side.. Put the hook through the stitch as shown.

Yarn over and draw through, a slip stitch.

Turn the hook so that you are now going through the double bars on the shoulder strap. Single crochet.

so that it looks like this.

Bring the hook back down to the body of the purse and slip stitch here.

now chain three, then work double crochet across
to here, then chain three and slip stitch.

Work slip stitches across to ...

here.

work one slip stitch in each of the first two chains. Then chain 1.

Work a single crochet in the third chain. Single crochet across...

to here. Single crochet in the top chain of the chain 3.

then chain 1.

slip stitch in the next two chains.

Then pull the loop through to the back.

like this.

Pull the tail of the yarn through and weave it in.

This is what the purse base looks like from the back...

and from the front.
Now to attach the flower...
I use the My Flower pattern and you can find it here: http://laurasfrayedknot.blogspot.com/2012/12/my-crocheted-rose.html
Here is the diagram for working the flower into a purse flap:

Notice the straight part...

Start by marking one of the unfinished loops on the back. Count 12 stitches and this is where you start. This is the straight part on the diagram.

Chain 6. Notice how we're working on the back of the flower.

Double crochet in the fourth stitch from where the chain 6 is.

Chain 4 then skip 2 stitches and double crochet again.

Continue on chaining 4, then skiping 2 stitches and double crocheting until you get to this point.

Chain 3 and double crochet in the same stitch as the yarn marker.

Chain 3 then double crochet in the same stitch. This is a corner.

Chain three then skip 3 stitches and single crochet in the next stitch.

Chain three and skil the next three stitches and single crochet in the next stitch.

Chain 3 and double crochet in the same stitch at the original chain 6 from this row.

Chain 3 and slip stitch into the third chain. This finishes the first row.

Chain three.

Work three double crochets in the chain 3 space, then chain 2.

Work 4 double crochet in the next chain 4 space. Chain 2. Continue working 4 double crochet then chain 2 until you get to the first corner.

Work 4 double crochet in the corner then push the stitches over to the right. Chain 2. Work 3 double crochet in the same corner space as shown.

Chain one and work 3 double crochet in each chain 3 space, chain 1, ect... over to the next corner.

At the corner, work 3 double crochet, chain 2, 4 double crochet in the space. Chain 2 and slip stitch in the third chain of the chain three that started the row.

Chain.2.

Work the petal stitch in each of the double crochets from the last row

so it looks like this.

Chain 6.

Work the petal stitch in the next set of dc. Continue around until you reach the corner.

After you do the petal stitch in the side of the corner, chain 5. Attach the flower to the right corner of the purse with a single crochet.

Now work 3 double crochet in the correct space.

Count over three stitches on the purse and work a single crochet in the next space. I have marked it with a pin in the picture.

This row works like a granny square. Attach the flower to the purse every three spaces and between the 3 double crochet of the flower part.

After attaching the left corner to the purse corner, chain 5.

Work petal stitch in the 4 double crochet that is around the corner...

Chain 6 then slip stitch and finish off.

This is what it looks like so far.

Now get some white yarn and slip stitch then single crochet in the same place that the green joins with the purse corner.

Work sc, hdc, 5 (dc), hdc, sc. in each chain 6 space. Notice that I"m working over the tail of the white so that I don't have to weave it in later.. = )

Here are a few white scallops done.. notice the green tail is now being covered with stitches so I don't have to weave it in later...

Here we are at the other end.

Work a single crochet in the save stitch as the green stitch.. Pull the loop to the back and weave in the end.

Here is the purse flap laid open. You see the back of the purse.

Here is the inside, or backside, of the flower.

Here is the front flap of the purse all done!
Here is a picture of the purse, the necklace, and the crown. What I like about this crown is that if you step on it it won't break or make your foot bleed... = )
isn't she cute!
Instructions for the neckalce can be found here:
and instructions for the crown can be found here:
http://laurasfrayedknot.blogspot.com/2013/01/crocheted-tiara.html