Ever since I had my first baby I have been bothered by the nativity scenes that have Mary kneeling beside the manger. First, she just gave birth, she's sleeping. And second, I'm pretty sure that Joseph would be spending a lot of time that evening holding the baby. Who can resist holding a newborn? I adore Joseph and feel that he is horribly overlooked in the whole nativity story.. So that's why Mary is sleeping and why Joseph is holding Baby Jesus - showing him off to the shepherds.. = )
The various cardboard tubes used in the nativity. You don't have to use these, but they do make it much more sturdy - which can be important if kids are going to be playing with it.
Both of the camels and Mary use the Pringles tube. They all have the tube flattened a bit into an oval. The paper towel tube is for the angel. The Bert's Bees tube is for the sheep and the toilet paper roll is for everything else. The Donkey gets his toilet paper tube flattened into an oval too.
Here is my wonderfully crayon colored background with the two pieces glued together and the corner slots punched out. Notice that I cut straight across the top to make it easier to punch the corner slots. If you don't have the corner punch, then just glue the manger piece to the back piece -glue only goes down each side.
Now cut along that top line.
This is the stable. Use a craft knife and CUT where the RED lines are. Use a ruler and a stylus to SCORE the BLUE lines.
This is the back of the stable piece (obviously before I glued the two pieces together) and you can see where the cut lines are.
Now we start folding the stable. Pull the center front of the stable towards you and push the center of the Jerusalem skyline back.
Gently fold the stable up from the skyline along those back scored lines. Don't hard crease them yet.
Now fold the front score lines as shown. The folds can be hard creased now.
Go over to the side and work the folds the same way.
one side folded!
Fold each side down flat to set the folds. Then put the corners of this piece into the corner slots of the background piece.
Take another piece of cardstock and sort of cut it in half lengthwise. Discard the top piece.
fold it in half then unfold. Put glue just along the outer edges and glue it to the back of the backing piece. (the purple lines were "painted" with my picture program to show where the glue goes to glue this piece onto the back. Only put glue on the sides and not the top or bottom.
Notice the gap at the bottom of the stable - the blue line.. also notice the red line. You need to cut the stable piece here to allow the stable to fit snug in the corner slots. You may need to do this on all 4 corners.
Filling the gap is what the hay pieces are for. = )
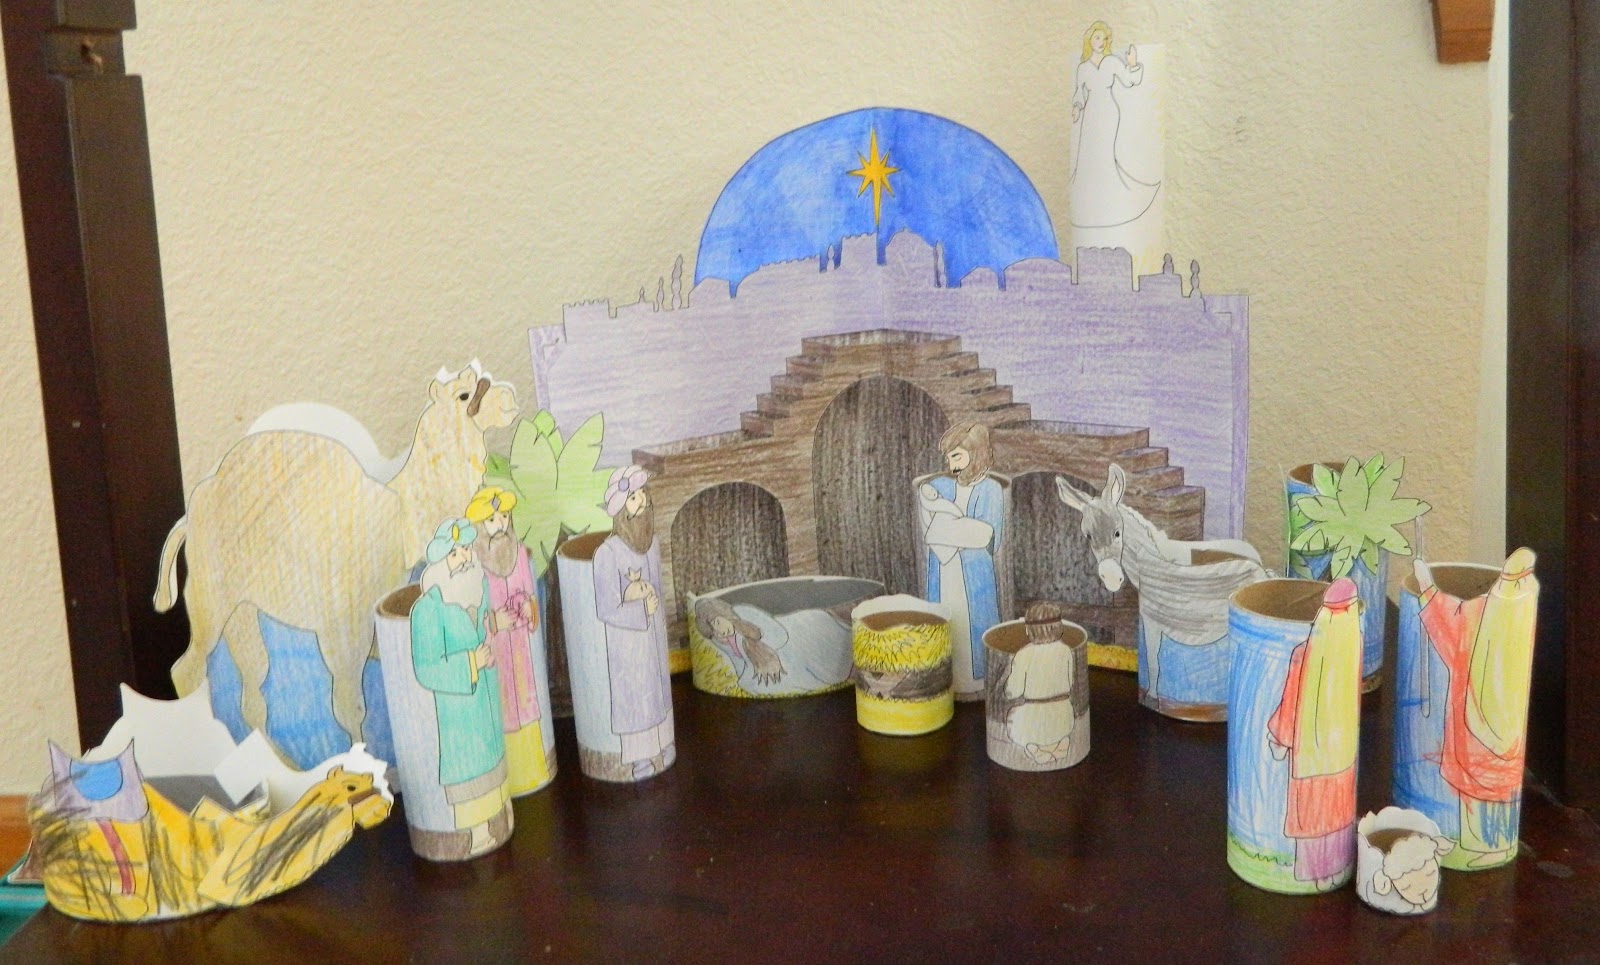
Here is the completed manger. That pocket we put on the back holds the start piece upright.
Here is is from the back.
Now for the animals...
Here is the camel all colored and cut out.
Cut the slits in the head piece wide as shown.
Soft fold the camel in half. Don't make a hard crease.
The camels both wrap around pringles can pieces.
Glue the camel to the Pringles can.
Glue the back legs and tail together. You'll need to hold it for a minute until the glue holds.
Now cut the slits in the front as shown.
Attach the head to the body.
Here's the top view of the finished camel.
The donkey is done the same way except that the head and neck are separate pieces. The donkey can also face either direction as there are two heads. Glue them on top of the neck. Notice the tail...
The sheep has the tail glued together in back as shown.
The sheep doesn't have a neck, just the face glued in the center.
This is just a close up of the trees.
The angel goes on the paper towel tube and since she goes behind and above the manger, I didn't cut the tube so she would be tall enough. It doesn't matter that the tube shows on the bottom because it's behind the stable.
Here are the colorable patterns. You may need to copy and paste them into a picture program before printing.
For those of you that don't want to color all these pieces, here are some colored ones you can print after you copy and paste them to a picture program.
I think I got them all... if I missed any please let me know = )
If you don't want to use the cardboard tubes, here is a variation that will let you change the size of the thing. You can make it any size you want.. You won't be limited to the size of the cardboard tubes.
Cut out the background leaving only the ground.